How to Check and Replace Your Brake Pads Safely: Ever felt that sinking feeling in your stomach, that moment of sheer panic when your brakes feel…off? That’s the kind of feeling that keeps us up at night, especially for us motorcycle riders who rely on our brakes for everything. This isn’t just about stopping; it’s about safety, control, and ultimately, enjoying the open road with peace of mind.
We’ll break it down step-by-step, ensuring you can confidently tackle this yourself, and along the way, we’ll see how the RidingMoto app can make your riding experience even smoother and safer. Knowing when your brake pads need attention is half the battle. Regular checks are key, and thankfully, it’s not rocket science. Let’s dive in!
How to Check and Replace Your Brake Pads Safely: Understanding Your Motorcycle’s Braking System
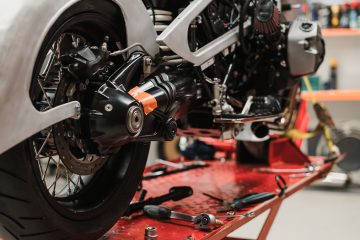
Before getting your hands dirty, understanding the basics of your motorcycle’s braking system is paramount. Most motorcycles utilize disc brakes, featuring a rotor (the spinning disc) and a caliper (housing the brake pads). When you squeeze the lever, the caliper clamps down on the rotor, using the friction of the brake pads to slow or stop the wheel. Different motorcycle models might have variations, such as single or dual-disc setups, but the fundamental principle remains the same.
This is where having the right information at your fingertips can be invaluable. The RidingMoto app offers detailed information on specific motorcycle models. Imagine needing to check your brake pads mid-trip; the app’s database and interactive diagrams could significantly aid in the process!
Visual Inspection: The First Line of Defense
The easiest way to check your brake pads is through a visual inspection. You’ll typically need to remove the wheel to gain proper access, but this is often a straightforward task. Consult your owner’s manual for specific instructions on removing your motorcycle’s wheel. Once the wheel is off, you’ll get a clear view of the brake pads nestled within the caliper.
Here’s what you’re looking for:
- Pad Thickness: Most brake pads have wear indicators – small grooves or lines etched into the pad’s surface. When these indicators reach a certain point, it’s time for a replacement. Your owner’s manual will specify the minimum acceptable thickness. Don’t guess!
- Pad Surface: Examine the surface of the pads. Excessive glazing (shiny, glassy surface) or scoring (grooves and scratches) might indicate issues with the rotor or a need for replacement.
- Caliper Condition: While you’re there, inspect the caliper itself for any signs of damage, leaks, or sticking pistons.
Remember, if you’re unsure about anything, err on the side of caution. It’s always better to replace your brake pads sooner rather than later. Think of it as an insurance policy against a potentially dangerous situation.
Measuring Brake Pad Thickness: Getting Precise
While a visual inspection is sufficient for many riders, using a caliper (the measuring tool, not the brake caliper!) provides a more precise measurement. This ensures you’re well within the safe operating parameters. You can easily get a digital caliper online or at any auto parts store. This little investment adds a layer of precision to your maintenance routine, providing peace of mind.
| Minimum Pad Thickness (Example) | Manufacturer | Motorcycle Model |
|---|---|---|
| 2mm | Brand X | Model Y |
| 3mm | Brand Z | Model A |
Note: The table above provides example values. Always refer to your owner’s manual for the specific minimum thickness for your motorcycle’s brake pads.
Replacing Your Motorcycle Brake Pads: A Step-by-Step Guide
Replacing brake pads involves several steps, and safety should be your top priority. Again, consult your owner’s manual for model-specific instructions. This is where having a reliable source of information, like the RidingMoto app, with its integrated repair guides could really shine! The app can even provide helpful videos and instructions, guiding you through the entire process.
Here’s a general overview:
1. Secure your motorcycle: Use a center stand or paddock stand to ensure stability. Safety first!
2. Remove the wheel: Follow your owner’s manual instructions.
3. Remove the caliper: This usually involves removing caliper mounting bolts.
4. Compress the caliper piston: Use a specialized tool or carefully compress the piston using a C-clamp (be cautious not to damage the piston seal).
5. Remove old brake pads: They should simply slide out.
6. Install new brake pads: Ensure they’re seated correctly.
7. Reassemble everything: Reverse the steps you took to disassemble.
8. Bleed the brakes (if necessary): Some systems require bleeding the brakes after a pad replacement to remove any air that might have entered the system. Refer to your owner’s manual on how to do it correctly. A wrong technique here can compromise your braking system’s efficiency.
Remember: Always use the correct brake pads for your motorcycle model. Using the wrong pads can lead to serious consequences.
Post-Installation Checks and Test Ride
Once you’ve replaced your brake pads, it’s vital to perform a thorough inspection and test ride. Double-check that everything is securely fastened and that the wheel rotates freely without rubbing against the brake pads. A test ride in a safe, controlled environment (like an empty parking lot) is crucial to ensure your brakes are functioning correctly.
This is where the RidingMoto app’s real-time location tracking could be a lifesaver. While you test your brakes, the app can precisely track your movements, ensuring that you’re not inadvertently testing your new pads in a busy area.
The RidingMoto Advantage: Making Riding Safer and Easier
Throughout this process, you’ve likely seen how the RidingMoto app can enhance your motorcycle maintenance and riding experience. From providing detailed information on your specific bike model to offering step-by-step guides and real-time location tracking during test rides, RidingMoto is designed to streamline the entire process, making it both simpler and safer.
Imagine planning your next motorcycle trip with the app’s intuitive trip planner. You can chart your route, mark points of interest, and even find suggested maintenance stops along the way, ensuring you have enough time to inspect and maintain your motorcycle, including those crucial brake pads! RidingMoto’s safety features, like real-time alerts and rider communities, further contribute to a safer, more enjoyable riding experience.
Conclusion
Checking and replacing your motorcycle brake pads might seem daunting at first, but with the right information and a systematic approach, it’s a manageable task that every rider should master. Regular inspections, coupled with prompt replacements when needed, are crucial for ensuring your safety and maintaining control on the road. Remember to always prioritize safety and consult your owner’s manual for specific instructions.
The RidingMoto app complements these efforts by offering a comprehensive suite of tools designed to enhance your riding experience. From detailed repair guides and trip planning to safety alerts and a thriving rider community, RidingMoto is the ultimate companion for any motorcycle enthusiast. Download RidingMoto today and start experiencing the ride of your life—safely and confidently.
FAQs
How often should I check my motorcycle brake pads?
It’s recommended to check your brake pads at least every 2,500 miles or every few months, depending on your riding habits. More frequent checks are necessary if you ride aggressively or frequently in stop-and-go traffic.
What are the signs of worn-out brake pads?
Signs include a squealing or grinding noise when braking, a spongy brake lever feel, a longer braking distance, and visible wear indicators on the brake pads themselves.
Can I replace my brake pads myself?
Yes, many riders successfully replace their brake pads themselves, but it requires mechanical aptitude and careful attention to detail. If you’re unsure, consult a professional mechanic.
What tools do I need to replace brake pads?
You’ll typically need wrenches, screwdrivers, a caliper (measuring tool), possibly a C-clamp or specialized piston compressor, and potentially a brake bleeding kit.
What type of brake fluid should I use?
Always use the type of brake fluid specified in your owner’s manual. Using the wrong fluid can damage your braking system.
What happens if I don’t replace worn brake pads?
Worn brake pads can lead to reduced braking performance, increased stopping distances, and potential brake failure, which can be extremely dangerous.
How much does it cost to replace brake pads?
The cost varies depending on the motorcycle model and the type of brake pads used. It’s generally cheaper to replace them yourself compared to using a mechanic.
Can I use any brake pads?
No, always use brake pads specifically designed for your motorcycle model. Using incorrect pads can lead to poor performance and potential damage.
How do I know if my brake fluid needs changing?
Your owner’s manual will specify the recommended interval for brake fluid changes. Brake fluid absorbs moisture over time, which can reduce its effectiveness.
What should I do if I experience brake problems while riding?
If you experience any problems with your brakes while riding, pull over to a safe location immediately and assess the situation. Contact a roadside assistance service if necessary. Avoid risky maneuvers.
You can follow us on
Facebook | Twitter | Instagram | LinkedIn | Pinterest | YouTube
By: RidingMoto Rider